Super Mario 64
![]()
Super Mario 64 is probably the first "big" recompilation/PC port effort; however, this was before the generational "revolution" of Ship of Harkinian/modern Recompilations, which make the process a lot easier.
Other ports may involve manually building the emulator, or being a less "all-in-one" solution. This is why I default to Ship of Harkinian below, but the port offers a much more limited set of features (the major one being a fully-analog camera). I'll include one of the easier ports below the Ship of Harkinian instructions, just for variety's sake or if you want more features.
In short: use Ship of Harkinian unless you're comfortable tinkering.
Ship of Harkinian Ghostship - Installation
This Super Mario 64 port is a Ship of Harkinian project called Ghostship.
- Download a release from the Releases page for Ghostship. Extract it somewhere, and keep the folder handy.
- Find a ROM of Super Mario 64 online, and make sure it's in a .z64 format
- Place the ROM inside the same folder as where you extracted Ghostship.
- Run
Ghostship.exe; a window should pop up asking about generating anO2Rfile. Click "Yes." You may need to locate your ROM. - A command prompt should open and a bunch of code should start scrolling. Stay calm, this is okay.
- Eventually, the process will finish and the game will open. From now on, Click
Ghostship.exein order to open the game.
Syncing Your Save Data
Ghostship saves your save data in a file called default.sav in your Ghostship directory.
To sync using SyncThing:
- Create a folder sync that points to your Ghostship folder.
-
In the
Ignore Patternspane, add:!default.sav * -
Before sharing the folder using SyncThing, download and extract Ghostship on your second device.
- Share the folder using SyncThing.
- On your second device, set the folder's target to be inside your Ghostship directory. Example:
D:\Ghostship. The save should be copied over and be usable.
Customizing your Game
When the game is open, type ESC on your keyboard to open the menus.
As this release is considerably less developed than other Harkinian ports, there is less to configure, here.
Controls
Default controls for the game can be found here.
My usual Nintendo 64 layout may need to be tweaked, especially as there isn't analog camera controls for Ghostship. This is a thread explaining the reasoning.
Enhancements
Graphics
Use Alternate Assetsis only really used by Mods to load alternate assets.Show Power Meter Alwayswill show your health meter at all times or not.
Gameplay
These are mostly self-explanatory.
Disable LODwill avoid having the game change to low-quality assets at a distance (something the original did to save space).Select Any Starshould be disabled if seeking a vanilla experienceCollecting Stars Will Not Exit Levelis self-explanatory; this is to your taste.Skip Intro Peach CutsceneandSkip Intro Lakituare mostly time-savers if you've played the game before.
Fixes and Cheats
Self-explanatory, for the most part. Hover over the option to see an explanation.
Super Mario 64 Plus
- Download the Super Mario 64 Plus launcher. Extract
SM64Plus.exe. - Running it will ask you to install the port to a folder. Choose one and install it.
- Go to that folder and run
Super Mario 64 Plus.exe. - The Launcher will check your
MSYS2installation. Then it will prompt you to find your.z64ROM.
The Launcher will then attempt to extract/convert your ROM. However it will fail. This is a known issue1. To fix it:
- After running the Launcher and the build process failing, open the directory you created in Step 2 (example,
/Super Mario 64 Plus/). - Open the
sm64plusdirectory. This may only be generated after failing the first build. - Go to the
toolsfolder. Openarmips.cppin Notepad (or like me, Notepad++). - Go to line 221. Create a new line, and then add
# include <cstdint>to that line. Then save the file. The section of the file should look like the image below (with the highlighted line being added).
Then, re-open Super Mario 64 Plus.exe. Choose your ROM again. The process should work properly this time, and the Super Mario 64 Plus menu should show up (with music you can't disable, unfortunately).

Syncing Saves
Unfortunately, the "make it portable" feature is broken on the game, so your save files will be in your %LOCALAPPDATA%/SM64Plus folder on Windows.
- Press
WIN + Rto open a command prompt, or open the Start menu and typecmd. - Paste
%LOCALAPPDATA%/SM64Plusinto the command prompt. It should open a folder. - The folder should contain
savedata.binand other files.
To sync using SyncThing:
- Create a folder sync that points to the folder that you found above.
-
In the
Ignore Patternspane, add:!savedata.bin * -
Before sharing the folder using SyncThing, install SM64Plus on your second device. Run the game at least once.
- Share the folder using SyncThing.
- On your second device, repeat the steps above to find your
%LOCALAPPDATA%/SM64Pluson that machine. Set the synced folder location to that directory.
Options
From the main menu, you can go to Controls and navigate left/right to go to different options screens.
Progression
The main tweaks I'd suggest are in the Progression menu.
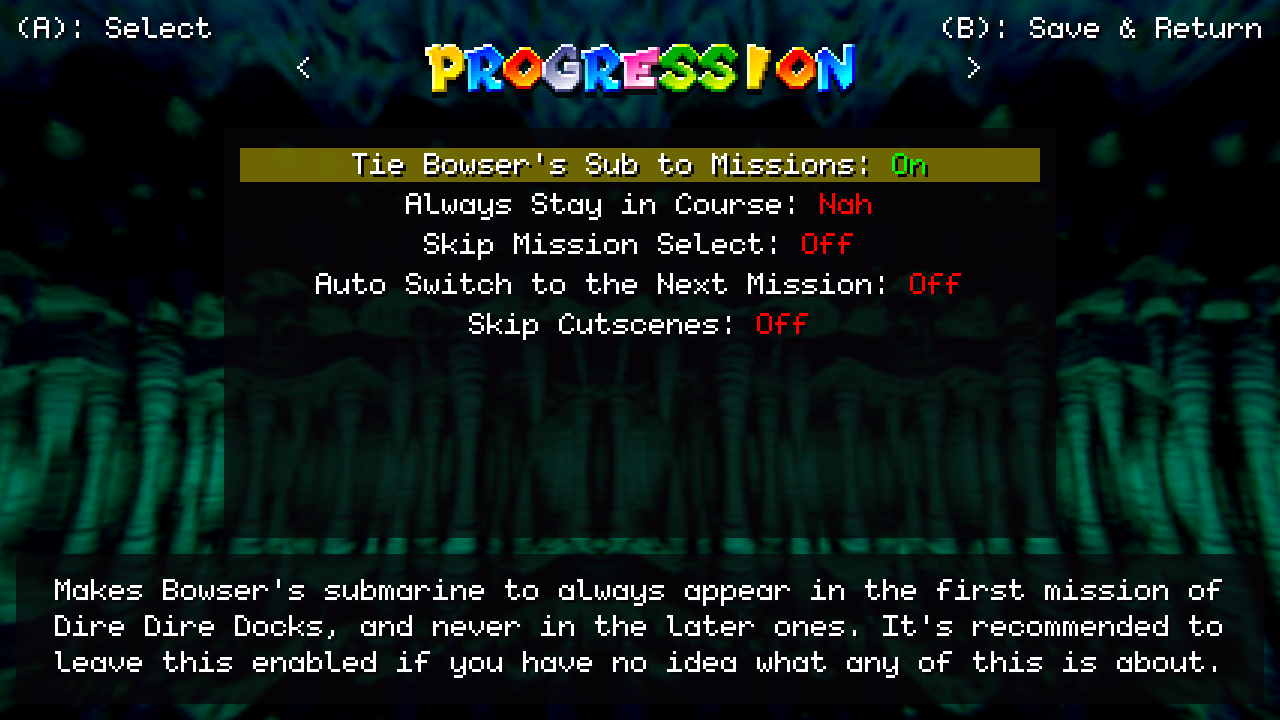
Always Stay in Course, Skip Mission Select and Auto-Switch to the Next Mission streamline the process of getting a star and getting kicked out of the level. Skip Cutscenes also get you into the game faster (skipping the intro cutscenes). Your mileage may vary.
Controls
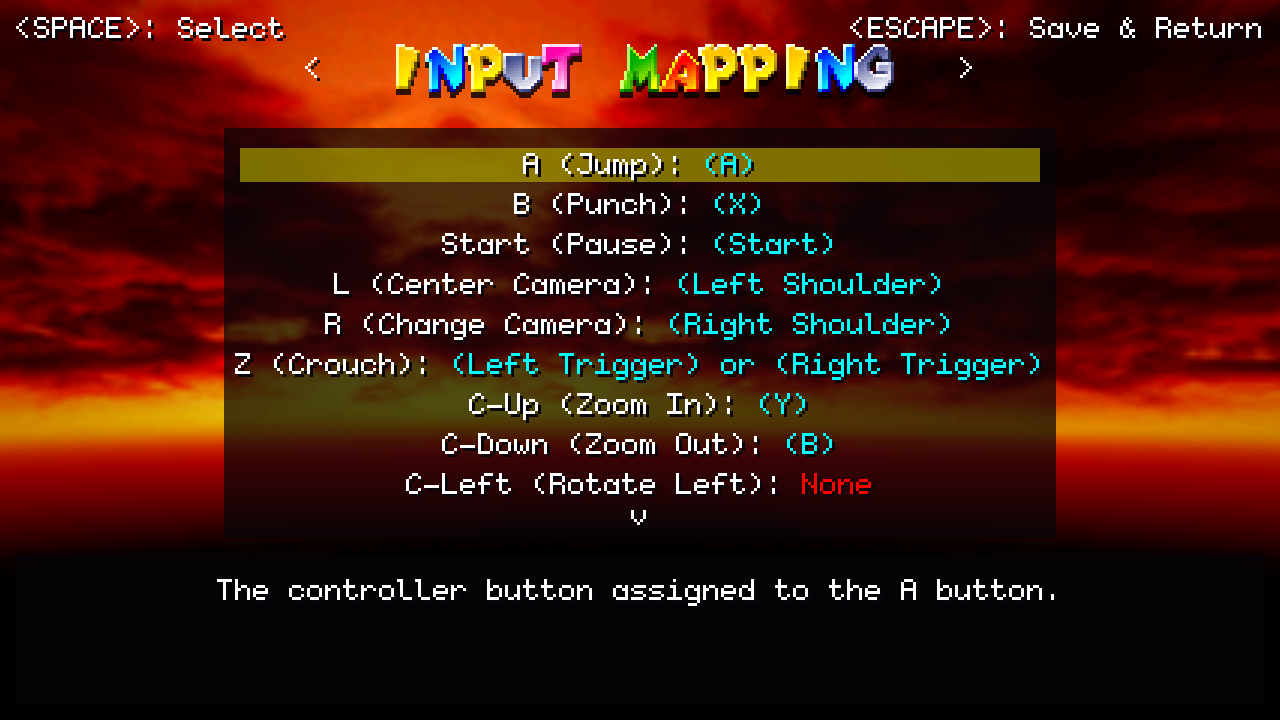
Near the right end of the settings menus, you can customize your controls (either a controller or a keyboard). The default controller mapping is very similar to my Zelda 64 layout, but removes C-Left and C-Right (changing it to an analog camera control) and mapping Z to both trigger buttons. L and R are mapped to the bumpers.
Camera
In the Camera menu, we can enable the analog camera if it's already not enabled.
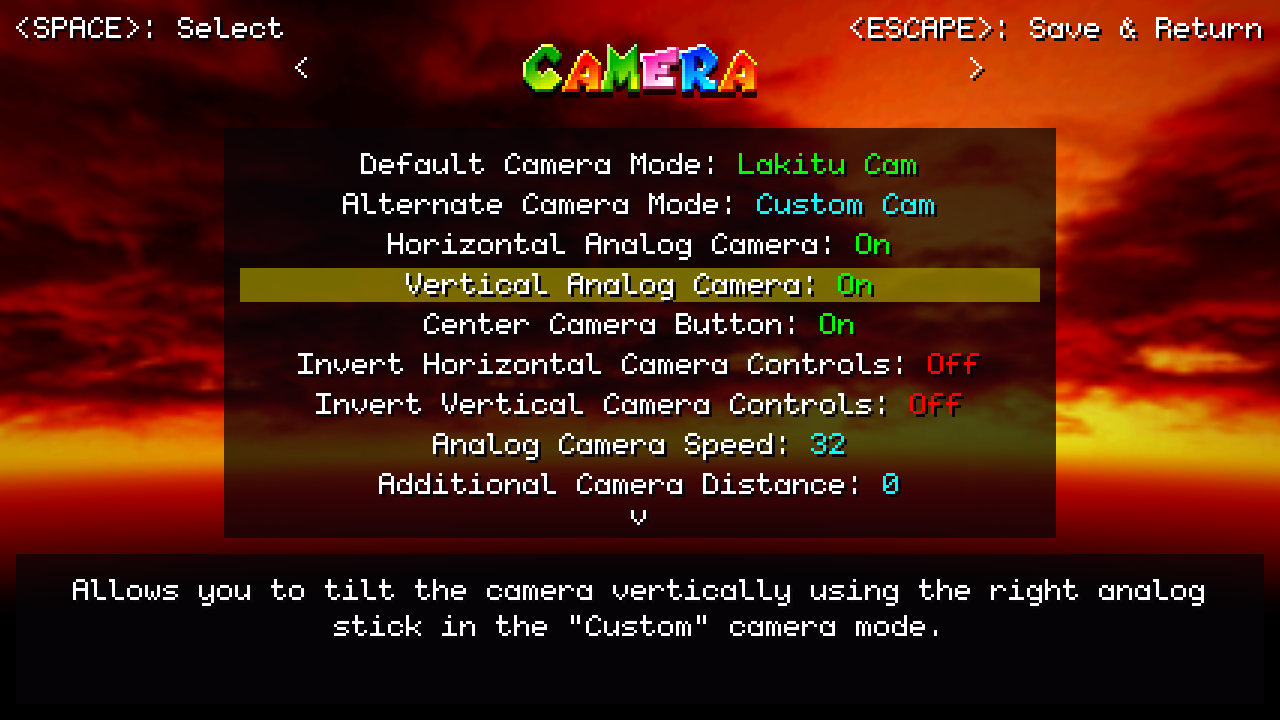
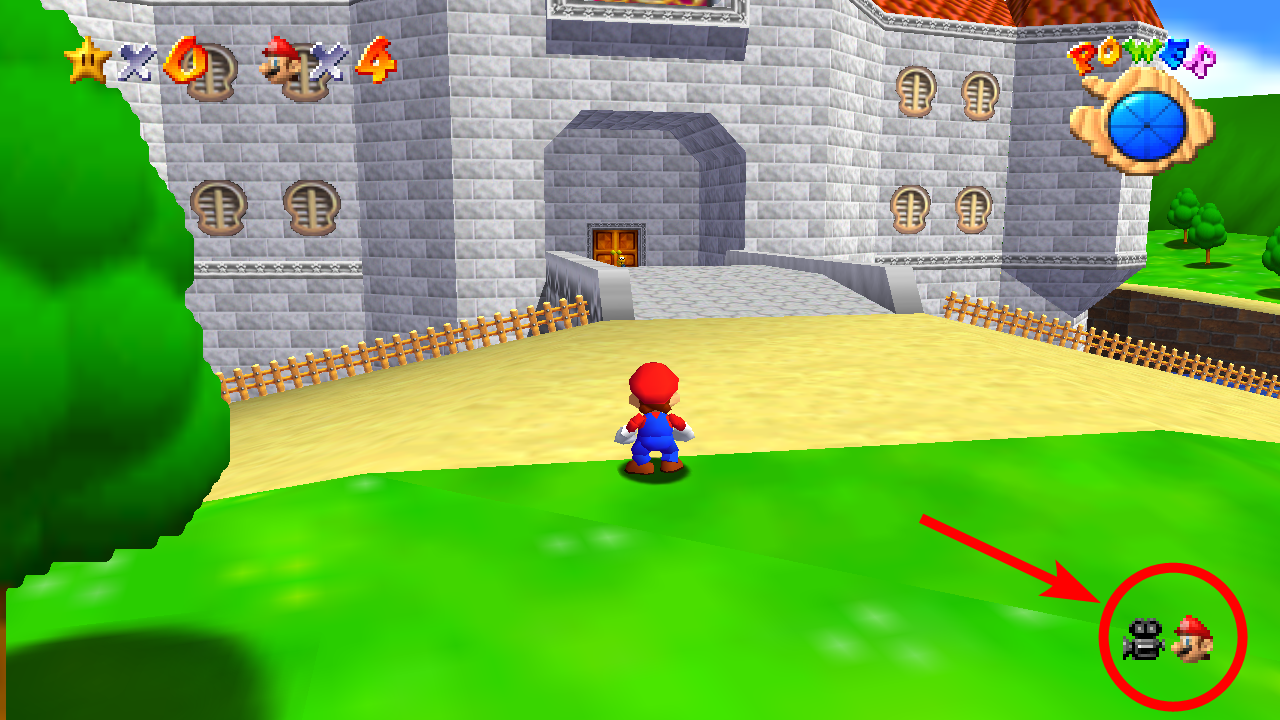
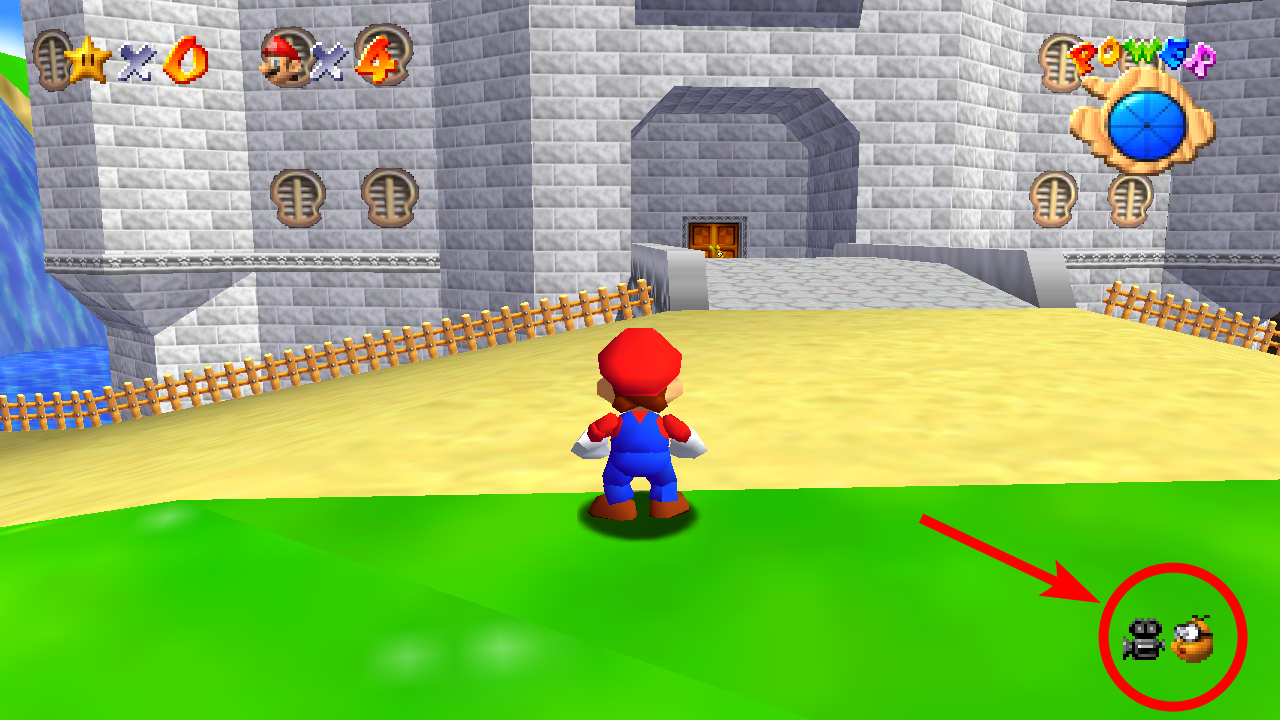
The Default Camera Mode and Alternate Camera Mode matter; Lakitu Cam only allows you to use horizontal analog control, while Custom Cam replaces the "Mario Cam" from the game, and allows for full analog control. You can see which camera mode you're in while in-game with the below icons. You can change your camera mode with Right Shoulder.
Lakitu Cam (Lakitu Icon):
Custom Cam (Mario Icon):